brought to you by Taylor'd Design
 
Thank you Pinterest yet again for another wonderful blogger post. Check out the original recipe at the end as always.  My Love has been getting tired of pumpkin soup so I thought something sweet would be a nice change. While he worked on Saturday I took a bit of me time in the crazy schedule and did some kitchen time. The whole house smelled like a fall candle when he got home. The bread tasted even better than it smelled.

Ingredients:

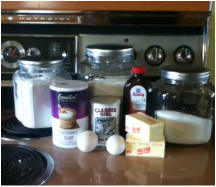
For the Bread Batter:


3/4 cup brown sugar, lightly packed
2 large eggs
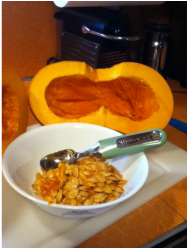
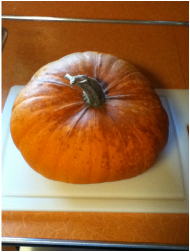
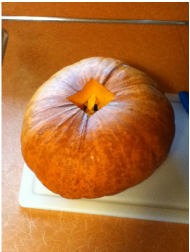
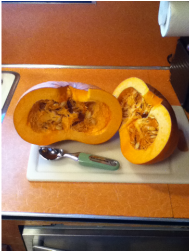
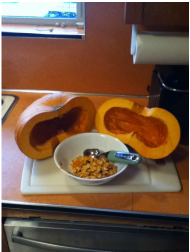
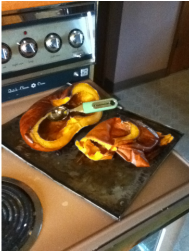
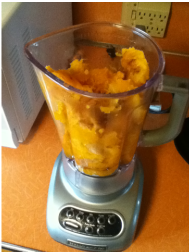
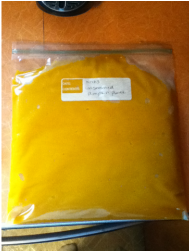
3/4 cup pumpkin puree (homemade or canned is fine; NOT pumpkin pie filling)
2 tablespoons canola oil
1 teaspoon pure vanilla extract
1 1/4 cups all-purpose flour
1 1/4 teaspoons baking powder
1/4 teaspoon baking soda
1/4 teaspoon salt
3/4 teaspoon cinnamon
1/2 teaspoon nutmeg
1/4 teaspoon ginger
1/8 teaspoon cloves


For the Cream Cheese Topping

8 oz cream cheese, room temperature
1 large egg, room temperature, lightly beaten
1/4 cup powdered sugar
1/2 teaspoon pure vanilla extract


Picture

Preheat Oven to 350 degrees F.
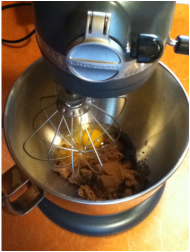
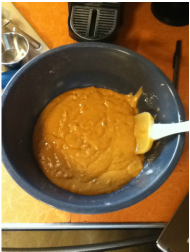
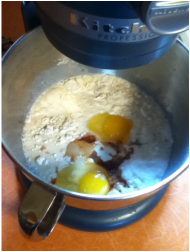
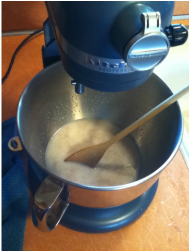
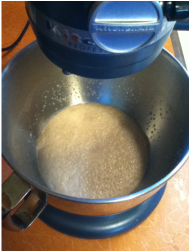
Mix the brown sugar and the egg together until light and fluffy. (this is important)

Picture


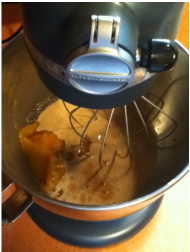
Mix in the pumpkin, oil, and vanilla.

Picture

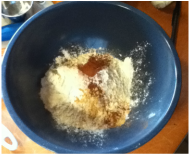
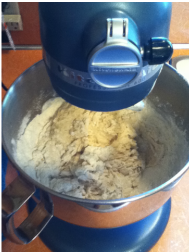
Mix together all the dry ingredients. Whisk them together until well combined.

Picture


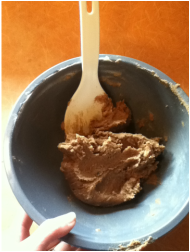
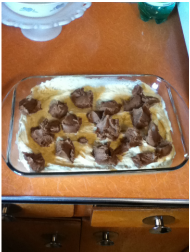
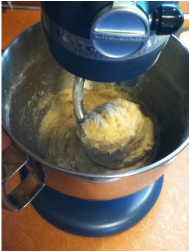
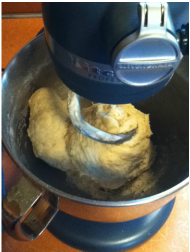
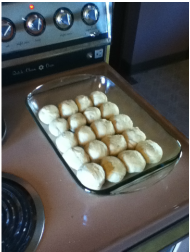
Add the wet mixture and dry mixture together. For this step be careful not to overmix.. Just enough mixing to combine all the ingredients.  Pour into your lightly greased bread pans. I used three separate pans lightly rubbed down in butter.

Picture


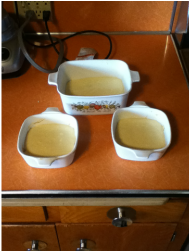
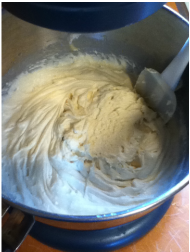
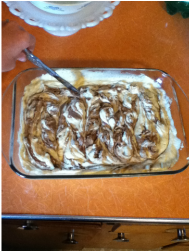
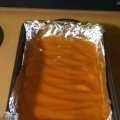
Mix the Cream Cheese Batter ingredients until smooth. Pour over the top of the bread batter.

Picture
 

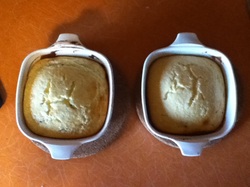
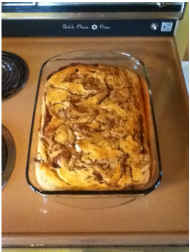
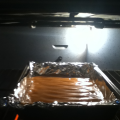
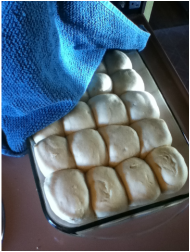
Bake for 30-35 mins. The edges will be golden brown and your tooth pick will come out clean.

Picture


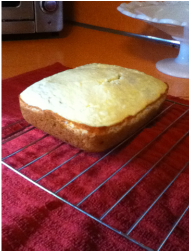
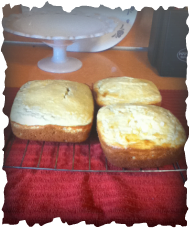
Let cool in the pan for 10ish minutes. (you'll see the bread has pulled away from the sides) Transfer to a wire rack to cool.

Picture


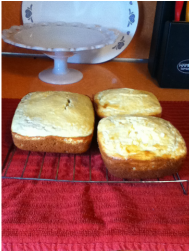
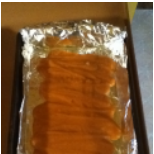
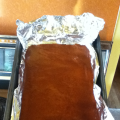
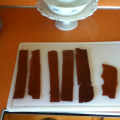
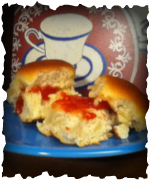
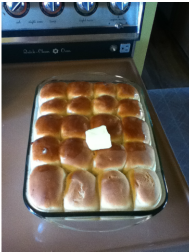
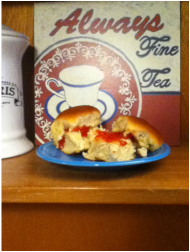
With light butter these delicious little loaves are to die for! Enjoy!

Special thanks to Thanksgivingrecipes2013.blogspot.com for the great recipe. Want to see where I got the recipe? Just click on the name!
 
We all have had those pumpkins that we decorated with but didn't know what do with them after the season. What we did know was that we didn't want to waste them. This year My Love grew 5 fantastic large pumpkins in the our garden. He started them a bit early and they have been decorating the house since the beginning of September. Pumpkin Puree is what makes those delicious pumpkin spice cookies/breads. I personally am a big fan of pumpkin soup. Canned pumpkin is easy you can literally just pick it off the shelf open the can and cook. I personally don't think it tastes as good. So to get that homemade taste and to make your house smell lovely for the day check out this post on making your own orange goodness.


Picture


Preheat the oven to 400 degrees F. Then choose your pumpkin.
I picked one of our largest. It didn't have any soft spots but it had been around the longest.

Picture


I cut the stem off (it had some serious pokey things going on and i didn't want to deal with that through this process). Some people will start by cutting it around the middle and leave the stem. Either way it doesn't matter.

Picture


Once I cut it all the way through I pulled out my weapon of choice to collect all those tasty little seeds.

Picture


Set aside those pumpkin seeds for roasting later if you like. (Pumpkin seed roasting post coming soon!). These little babies however were swiped by My Love for drying and packing up for next years garden.

Picture

Set the pumpkins on a baking sheet. I turn mine up so that when the bottom gets dark it's not burning the pumpkin meat.

Picture


After an hour and a half the meat should be nice and tender. Don't worry if the outside looks dark/ burnt in places. It will be just fine I promise.  Let the pumpkin cool until you can handle it.

Picture


Again my weapon of choice was my ice cream scoop. Carve out all the meat and place into a blender/food processor.

Picture

Only half of the pumpkin will fit in my blender at a time. You may need to use a wooden spoon and help mix things up half way through the puree process, depending on the strength of your blender.

Picture
This is a gallon size ziploc. It's holding half of the pumpkin. Write on the bag beforehand. I dated and wrote "Unseasoned Pumpkin Puree". Pour your puree in before sealing lay it down slowly allowing the pumpkin to push the air out of the bag. Then seal. If your puree is still warm let it finish cooling before placing it in the freezer for later use.

Picture
I decided on making Pumpkin and Cream Cheese Bread so I used the other half of the pumpkin in that recipe. This is all the waste that is left over. Seriously wonderful. No more throwing away the unused pumpkins after they get soft and gross. Now you know how to cook them up before they get gross and get double use out of them!  Check out the next post if you're curious about the Pumpkin Cream Cheese Bread and how it turned out.

 
I love cinnamon rolls. When I was a kid my mom made them from scratch. On my birthday weekend I decided to get lost in baking. Not to the full cinnamon roll extent but enough that I felt like I was at home. This was another wonderful Pinterest found recipe. The original recipe and the blogger who posted it will be listed at the bottom. Enjoy!
** Be warned this is delicious but sweet... not for the faint of hear!**
Picture
Cake Ingredients:
3 c. flour
1/4 tsp.salt
1 c. sugar
4 tsp. baking powder
1 1/2 c. milk
2 eggs2 tsp. vanilla
                                      1/2 c. butter, melted


Topping:
1/2 c. butter, softened
1 c. brown sugar
2 Tbsp. flour
1 Tbsp. cinnamon


Glaze:
2 c. powdered sugar
5 Tbsp. milk
1 tsp. vanilla

Picture


Mix everything together except for the butter.

Picture


Add in the melted butter Do not over mix or your batter will become fluffy the texture will be all wrong.

Picture
.
For the topping, mix all the ingredients together until well combined.
(this was mixed with 1 cup of butter as the original recipe called for, except that it made the batter too runny in the end and took twice as long to bake. Your topping will be crumbly and that's perfect not well mixed and a big clump like pictured)


Picture


Pour batter into a greased 9x13 pan and drop topping by spoonfuls over the top of the batter.

Picture


Using a butter knife swirl through the batter and topping until it looks something like this.

Picture


Bake at 350 for 40 minutes. When finished it won't have a jiggly middle (meaning also that the tooth picks you decide to insert will come out clean) and will be golden brown on top.


Picture


While the bread is cooling mix up the icing. When the bread is cool enough to touch pour the icing over the top. ( I cut a few pieces before pouring so that the icing would seep down the sides)

Eat and Enjoy!

Thank you Cookin' Up North! This is a delicious recipe! Want to see the original click on her name!
 
Remember that crockpot applesauce? Yup I'm using it in something else. These apples sure have gone a long way!  We took the apple chips with us on the plane for vacation then we had applesauce when we got home. Now here we are tired of applesauce and needing a new recipe. I decided to do some more searching and found a great tutorial from Findingjoyinmykitchen on her blog.  I'll attach her link at the end so that you can find her info. She uses parchment paper (which I couldn't find no matter how hard I searched this morning, but know I'll find when I don't need it anymore) and unspiced homemade applesauce.

1 cup homemade applesauce
Parchment paper
Cookie Sheet


**Note** Today I used tin foil since, like I said, the parchment paper decided to run and hide in some drawer somewhere. I also used a brownie pan. All my cookie sheets were dirty and I'm lazy today. Parchment paper will aid in storing your lovely strips. I know these won't last long today so I didn't fret the difference. So... yes if you see differences in the pictures from what you should use to make it easier on yourself don't worry it all turned out beautifully. And yours will too even if you don't have all the right things. **


Picture
I took the chunky applesauce from before and liquified it in my blender. Removing all the chunks because let's face it having chunky fruit leather would be really gross.

Picture
Spread the liquid over the parchment paper. Try for between 1/8" and 1/4" thickness.

Picture
Spread the center thinner than the outer edges as the edges cook faster.

Picture
Set your oven on a low heat setting (200 degrees F or less). Bake for 1-3 hours. Keep an eye on the edges. If they become done before the rest just cut them off and set them aside to store already and let the rest keep baking. When the leather is all done cut it and the parchment paper into strips and roll for storing.

Picture
The best indicator that the fruit leather is done is the shiny look the top gets. I unfortunately was downstairs too long and mine became overdone. It still tasted great it just had a crunch element to the top then the second batch I made did.

Picture
If using tin foil slowly peel it off the back of the leather. If using parchment paper just remove it from the cookie sheet and place it on the cutting board.

Picture
Cut into strips for easy storage. Roll the strips end over end and place in an air tight container. Enjoy!!! (These did not however make it to any container they were eaten right after then picture. So yummy!

As promised here is the link to Findingjoyinmykitchen's blog post. <--Just click on her name and check out the post! Enjoy!!!

 
Picture
I love my KitchenAid Pro... baking is so much more fun now (and a lot less messy). As a kid I had always had a secret desire to learn to make rolls. They always seemed very difficult and they never seemed like an attainable goal to my young mind. Well thanks to lots of finger research and Betty Crocker cookbooks I came up with a recipe of my own totally by accident that my Love just devours. This is a pretty basic roll recipe. These aren't light and airy. They are dense and heavy just perfect for a raining day or soup dinner. As I hone my skills I'll add some other more complicated recipes but again really shouldn't cooking and baking be the easiest most enjoyable task you preform all day?!

1 tbsp of rapid rise yeast
3/4 cup warm water
3/4 cup milk
1/3 cup sugar
1 egg
1/3 cup room temperature butter
2 tbsp honey
1 tsp salt
4 1/2 cups of flour
non stick spray


Picture

In the bowl with a wooden spoon mix yeast, warm milk, warm water, and sugar. (Warm is the key term here. Not hot, but warm. I usually pop both water and milk in the microwave for 30 seconds and test it with my finger. If you wouldn't give it to a baby because it's too hot then don't add it to the yeast.)

Picture
Cover with a kitchen towel for 5 mins and let the yeast proof.

Picture

At the end of 5 mins you should have a frothy mixture in your bowl.

Picture
I use a wooden spoon up until I use my dough hook because my beater attachment met a sad end in a dishwasher where it never should have been... *sigh*.

Mix in your butter, egg, salt, and honey.

Picture
Attach your bread hook, turn mixer to a low setting and begin to add flour a cup at a time. Allow time in between for the flour to incorporate. Somewhere between 4-5 cups will be right. You don't want your dough to be too sticky.

Picture

 You're looking for a good elasticity. I call it good when the dough is pulling away completely from the sides.

Picture
Take your cake pan quickly spritz it with non stick spray or smear it with butter/shorting.
Grab a small handful or dough and roll it into a ball. I make mine the size of Clementines or Cuties. Sometimes even smaller if I want to fit 4 instead of 3 across.

Picture
This time I fit 4 across.  With My Love was headed home from work in a few mins I wanted to be sure to have enough for his snack, dinner and tomorrow. (When he's in the house they disappear!)

When you're done cover the pan and allow the rolls to rise in a warm place until double in height (usually about an hour).

Picture
(At this step I usually turn on the oven on a low heat and leave the rolls to rise on top of the oven. Grandma's oven has a warmer section on the top, if yours has one great! If not don't worry just let the rolls rise in a warm place if it takes longer than an hour don't worry just let them keep rising.)

Picture
When rolls are almost done rising preheat the oven to 375 degrees F. Bake for 10 mins.

When they're all done they will have a golden brown top. I always run butter over the top right away and let it seep in to the edges to keep the crust soft. (I firmly believe this step above all else, even adding the honey , is what makes these disappear so quickly. Butter makes everything just that much better!

Picture
We have a sweet neighbor across the street who shared some of her homemade strawberry jam in exchange for some rolls a few weeks ago. Until that jam is gone this is the only way I'll eat them! Mmmm Mmmm MMMMMMM!

 
Remember the apple sauce and those left over apple peels? I didn't want to compost all of the left overs. Airport food is expensive and why not use as much as I can?! Apple Chips as a sweet and healthy treat sounded like a great idea.

2 cups apple peels (all shapes and sizes, some were strips some were pieces)
1/2 tsp cinnamon
1 tsp brown sugar

Take your brown sugar and cinnamon and mix it with your bowl full of peels.
I am a lover of tin foil. Seriously the stuff is amazing. I covered a cookie sheet with it and spread out the apple peels so there was a thin layer
.
. (no nonstick spray needed. if you'd rather use parchment paper that is fine too)
Set oven to a very low temp (200 degrees F or lower) and let it dry out the apples and cook in the spices for 2-3  hours.
Half way through stir/flip the pieces.
Keep your eye on them as the time gets closer. ( A few of mine got a tad crispier than I wanted.)
If some of them have stuck to the tin foil don't worry,  lift and bend it and the dry fruit will just pop right off.
Let them cool then put them in an air tight container/ziploc.
As for how long they will last I'm not sure yet, I'm not expecting this batch to make it off the plane but I will do a second batch and figure out how long they last in the near future.
Enjoy!

Picture
The skins I saved in a separate bowl. I did not keep the cores since the idea of making pectin wasn't too appealing today.


Picture
Here I just spread them out on a covered cookies sheet. The tin foil was a life saver helping the pieces just pop right off when they were done baking. Make sure to make a thin layer so that they will all bake well. A few of mine were too crispy. My Love still loved them but they weren't as flavorful as the rest.

 
Fall is here! I believe the weather changed today just so I could make something deliciously fall like on this cloudy day. We have lots of apples and I was afraid they would turn before we got home. So what better thing to do than to sit down and try to think about some recipes! I love the smell of cinnamon and didn't want to be stuck in the kitchen for hours so my crock pot became my go to.

12 apples ( 8 small 4 large) or however many it takes to fill up your crock pot. (Mine's the big one)
3 tsp Lemon Juice
5 tsp brown sugar (unpacked)
1 1/2 tsp cinnamon (because we all know a little goes a long way)
1tbs Honey


Wash, skin, and core your apples.  (Set aside skins if you want to follow my next recipe for  Apple Chips)
Place apple chunks in the crock pot on low.
Add lemon juice, brown sugar, cinnamon, and honey.

Let cook on low for 6-8 hours. Stirring occasionally. Enjoy the awesome apple scent that will fill your home! Seriously I feel like I need to make this everyday!

At the end you can either use a hand mixer, blender, immersion blender, or whisk to achieve the consistency you desire. I used the whisk/ wooden spoon combo because I like some substance to my food.  You can refrigerate up to 3 weeks. 


    A Tad About Me:

    I am a Christian, wife, caregiver, and nanny who loves to experience life through the senses. I'm very much a "I can do it myself" type of person and learning new things is a favorite past time, doesn't always mean it turns out right, but I do try!

    Right now my sweet husband and I are saving to buy a house and there are many many things we do to pinch pennies and still live full lives. If it's a challenge I find we try to make it fun every step of the way!

    Archives

    September 2013

    Categories

    All
    Apples
    Crock Pot
    Dinner Rolls